
Until September, I will writing some posts for America Test Kitchen's Dish It Your Way challenge. Every other week they give a dish or ingredient and two weeks for bloggers to make the dish and write about in their blogs. At the end, the social media team reviews them, posts links to the competing blogs, and picks a winner for an online subscription to Cook's Country. Wish me luck!
Next up in the Dish It Your Way challenge: burgers. When I showed Shawn the list of themes weeks back when the challenge began, he made sure to ask me if I was participating in this one. The man loves a good burger...and boy is he picky as to what "good" entails.
08 August 2011


01 August 2011
Camping Food, Part II
This part two of a three-part series about the greatest summer food of all: the stuff you cook by the campfire...or in this case, over the campfire.
This weekend we spent twopeaceful and quiet days at the ocean. What was supposed to be a short retreat to one of my all-time favorite locations, ended up being another entry in the Shawn and Carmel Adventure book. We arrived at our beach campsite only to discover that every.last.person. there owned at least one ATV. And when they weren't disturbing the peace of the ocean with their engines, they were tinkering away on them, and in the case of our neighbors, talking loudly and playing club music. Needless to say, we didn't spend too much time at our site. We retreated to another beach and the pub.
This weekend we spent two
24 July 2011
My Hundredth Post!
Until September, I will writing some posts for America Test Kitchen's Dish It Your Way challenge. Every other week they give a dish or ingredient and two weeks for bloggers to make the dish and write about in their blogs. At the end, the social media team reviews them, posts links to the competing blogs, and picks a winner for an online subscription to Cook's Country. Wish me luck!
How fitting is it that for my 100th (!!) post I get to write about an America's Test Kitchen recipe and enter it into the Dish It Your Way challenge?? Before I get started, let me just say it's been so much fun writing this blog and getting the very kind feedback from friends, family, and even the strangers who actually read what I write. This just started as a way for me to practice writing and keep myself accountable for challenging my culinary skills. So, thank you!
How fitting is it that for my 100th (!!) post I get to write about an America's Test Kitchen recipe and enter it into the Dish It Your Way challenge?? Before I get started, let me just say it's been so much fun writing this blog and getting the very kind feedback from friends, family, and even the strangers who actually read what I write. This just started as a way for me to practice writing and keep myself accountable for challenging my culinary skills. So, thank you!
17 July 2011
Camping Food: Part I
This part one of a three-part series about the greatest summer food of all: the stuff you cook by the campfire...or in this case, over the campfire.
The first of our camping trips this summer brought us to Tucker Park, about six miles south of Hood River, Oregon. I found the park by doing some Internet research on lesser-known camping spots and found an Oregonian article from 2008 profiling just such areas. Granted, three years after the article was written it was bound to have increased in popularity, but I figured it was worth a shot. We had been searching for a campsite we could reserve for so long without any luck, I was willing to take the risk.
Like any other weekend, my first thoughts of planning went straight to the food. We started with Shawn's favorite: foil packet dinners. I first heard of these potato-ham concoctions at one of my first overnight trips while I was away at sleep away camp in fourth or fifth grade. Back then it was probably pre-shredded potato and deli ham provided to us by the CYO kitchen. Nowadays, we've gotten ever-so-slightly more sophisticated. I actually shred my own organic potato, use Tillamook sharp cheddar cheese, and (admittedly) buy cubed ham. I know, I know....I don't even want to start to think about what happened to that poor pig when they slaughtered him. Anyway...we learned our lesson about using the proper foil and not overstuffing a packet years ago when we first made them at Olallie Lake. Undercooked potato on top, burnt and stuck to the foil potato on the bottom. Ick.
Of course after a great meal and some beers, it was necessary to make my famous s'mores. Not sure if they've actually become famous yet, but I have some fans.
Next camping trip is at the beach. Shawn has promised that I can cook hot dogs over the fire even though he doesn't love hot dogs. What a guy.
The first of our camping trips this summer brought us to Tucker Park, about six miles south of Hood River, Oregon. I found the park by doing some Internet research on lesser-known camping spots and found an Oregonian article from 2008 profiling just such areas. Granted, three years after the article was written it was bound to have increased in popularity, but I figured it was worth a shot. We had been searching for a campsite we could reserve for so long without any luck, I was willing to take the risk.
Like any other weekend, my first thoughts of planning went straight to the food. We started with Shawn's favorite: foil packet dinners. I first heard of these potato-ham concoctions at one of my first overnight trips while I was away at sleep away camp in fourth or fifth grade. Back then it was probably pre-shredded potato and deli ham provided to us by the CYO kitchen. Nowadays, we've gotten ever-so-slightly more sophisticated. I actually shred my own organic potato, use Tillamook sharp cheddar cheese, and (admittedly) buy cubed ham. I know, I know....I don't even want to start to think about what happened to that poor pig when they slaughtered him. Anyway...we learned our lesson about using the proper foil and not overstuffing a packet years ago when we first made them at Olallie Lake. Undercooked potato on top, burnt and stuck to the foil potato on the bottom. Ick.
 |
| Using nonstick foil and adding a little butter helps the end product not stick to the foil. For our packets, we using potato, ham, green onions and salt and pepper. |
 |
| Our cooking source for the night. |
 |
| Do NOT overstuff these or you'll end up with some nasty raw potato. |
 |
| Add enough layers to keep the insides from burning. |
 |
| A nice, hot fire is key...and if you don't have a grate to put over the fire, that's ok, it's cool to stick them right on the fire. Just make sure you use enough layers so it doesn't burn through the foil. |
 | |
| While in the past I've put cubes of cheese right into the packets, this time I bought shredded cheese, added it after they were done and just let it sit for a minute until it melted. |
 |
| The key to perfect s'mores? Lots of patience toasting the marshmallows and putting the graham cracker and chocolate near the fire to melt the chocolate before adding the perfect marshmallow. |
 |
| Pardon my unwashed hair...enjoying my creation. |
05 July 2011
Fourth of July BBQ
Until September, I will writing some posts for America Test Kitchen's Dish It Your Way challenge. Every other week they give a dish or ingredient and two weeks for bloggers to make the dish and write about in their blogs. At the end, the social media team reviews them, posts links to the competing blogs, and picks a winner for an online subscription to Cook's Country. Wish me luck!
Summer has finally arrived here in Portland and the arrival of the good weather means beer festivals, camping, and of course, more cooking on the BBQ. Shawn and I took advantage of the 80 degree weather and tried our hand at smoking ribs on the grill. The idea for ribs all came from my desire to enter the "Dish It Your Way" challenge from the America's Test Kitchen folks. As soon as I heard about this challenge, I knew I had to enter. Who loves the Test Kitchen more than I do? I even have a label for Test Kitchen posts, for goodness sakes. The week 3 challenge calls for potato salad posts, so ribs seemed like a fitting main dish.
At first the process seemed a bit daunting: making my own rub, two hours on the grill and then another hour sitting, AND making my own barbecue sauce...are you kidding me? But after we broke it down, it wasn't so bad. The instructions and illustrations from Cook's Illustrated always make things just a wee bit easier. The ribs require a little patience--much easier to have when your refrigerator is stocked with good Oregon beers. This is Oregon Craft Beer month after all!
And what goes better with ribs than a nice potato salad? I have been playing around with an idea for blue cheese potato salad in my head for awhile and finally got around to making it. Since we were already having pork, I decided to skip the bacon idea I had fearing it would get too rich, and instead focused on increasing the blue cheese flavor and adding thyme to the mix. It's a pretty simple recipe using red potatoes and basically the ingredients for a blue cheese dressing. It went very well with the ribs, giving our mouths a chance to cool off from all the spices I threw into the sauce. Perhaps I got a bit too liberal with the Sriracha...
And there you have it...summer is here, Portland. Take advantage while you can!
Summer has finally arrived here in Portland and the arrival of the good weather means beer festivals, camping, and of course, more cooking on the BBQ. Shawn and I took advantage of the 80 degree weather and tried our hand at smoking ribs on the grill. The idea for ribs all came from my desire to enter the "Dish It Your Way" challenge from the America's Test Kitchen folks. As soon as I heard about this challenge, I knew I had to enter. Who loves the Test Kitchen more than I do? I even have a label for Test Kitchen posts, for goodness sakes. The week 3 challenge calls for potato salad posts, so ribs seemed like a fitting main dish.
At first the process seemed a bit daunting: making my own rub, two hours on the grill and then another hour sitting, AND making my own barbecue sauce...are you kidding me? But after we broke it down, it wasn't so bad. The instructions and illustrations from Cook's Illustrated always make things just a wee bit easier. The ribs require a little patience--much easier to have when your refrigerator is stocked with good Oregon beers. This is Oregon Craft Beer month after all!
 |
| Secret to perfectly cooked ribs...great rub and lots of patience. |
 |
| I improvised a bit on the barbeque sauce and made the basic sauce and jazzed it up with a few of the ingredients for the tangy and sweet sauce. |
 |
| Served in the funky fish bowl Kara gave us. |
 |
| Use your thyme wisely--it takes a lot to stand up to the strong flavor of the cheese |
 |
| Have to take advantage of the limited asparagus season! |
Blue cheese and thyme potato salad
1 1/2 lbs. red potatoes (new potatoes would be ideal, but regular red potatoes work as well)
4-5 oz crumbled blue cheese
1 small shallot, minced
1 small garlic clove, minced
1 small garlic clove, minced
1/4 cup sour cream (lowfat works)
1-2 T mayonnaise
White wine vinegar
Green onions, sliced (green part only)
Fresh thyme leaves, minced
Cut potatoes into equivalent, bite-sized pieces and boil gently until cooked through, but not falling apart. While potatoes are cooking, combine half the blue cheese crumbles, sour cream, mayonnaise, shallots, garlic, and a splash of white wine vinegar, making sure to mash the blue cheese into the sauce. If it seems a little too thick, adjust with sour cream and vinegar. Add about 3/4 green onions and mix until just combined.
After the the potatoes are cooked through, drain, place in a large bowl, and toss with enough white wine vinegar to lightly coat the potatoes. Let the potatoes cool in the bowl at room temperature for about 20 minutes.
After the potatoes have cooled, combine gently with already made blue cheese sauce. Toss in the rest of the blue cheese crumbles and top with green onions.
At this point, if you wanted to add bacon, you could throw some fried up bacon bits on top.
After the the potatoes are cooked through, drain, place in a large bowl, and toss with enough white wine vinegar to lightly coat the potatoes. Let the potatoes cool in the bowl at room temperature for about 20 minutes.
After the potatoes have cooled, combine gently with already made blue cheese sauce. Toss in the rest of the blue cheese crumbles and top with green onions.
At this point, if you wanted to add bacon, you could throw some fried up bacon bits on top.
20 June 2011
Pizza Night
When I was staying with my family in Spain, every Friday night we would make pizzas and watch a movie. It was my small contribution for them generously letting me stay at their house and corrupt my teenage cousins. Anyway, my uncle would make pizza dough and I would take the cousins to go load up on delicious toppings at the market. My specialty, the Carmel special, basically just had everything on it. Saturday night, with a busy week ahead, we decided to have a little pizza/movie night at home. It was another drizzly day in Portland, so instead of the plan to grill the pizzas, we ended up just doing them inside. I also forgot to make dough, so we bought a couple pounds from Trader Joe's. Their dough is actually pretty good and a good deal at around $1/lb.
All that paired with a delicious bottle of Barbera from Rosa D'Oro, made for a delightful evening. We watched The Social Network, and although it was entertaining and pretty interesting, I'm not sure why it was nominated for so many awards (other than the soundtrack, which was well done). Oh well, at least the food and wine was great!
 |
| Our toppings, starting at the top (clockwise): fontina cheese, fresh tomatoes, sage, jamon serrano, mozzarella, and sauteed mushrooms |
 |
| From farthest to closest: plain cheese, mushroom/fontina/sage, jamon serrano/fresh tomato/arugula |
 |
| Cheese...ready for its close up. Made with a combo of the plain and whole wheat dough. Little fresh basil from the garden on top. |
 |
| Sauteeing the mushrooms beforehand rids them of excess moisture ensuring the crust stays crisp during baking |
 |
| Although we put the arugula on at the end, I stuck it back in the oven to stay warm for seconds. The wilted arugula was delicious, as well. I can see it going in for a minute at the end of baking to char it a bit for an even more pleasantly bitter addition. |
 |
| Trio of fresh pizza |
 |
| This has nothing to do with the pizza, but it's the salad I made the next day with the rest of the arugula. |
14 June 2011
Farmers Market Inspired Weekend
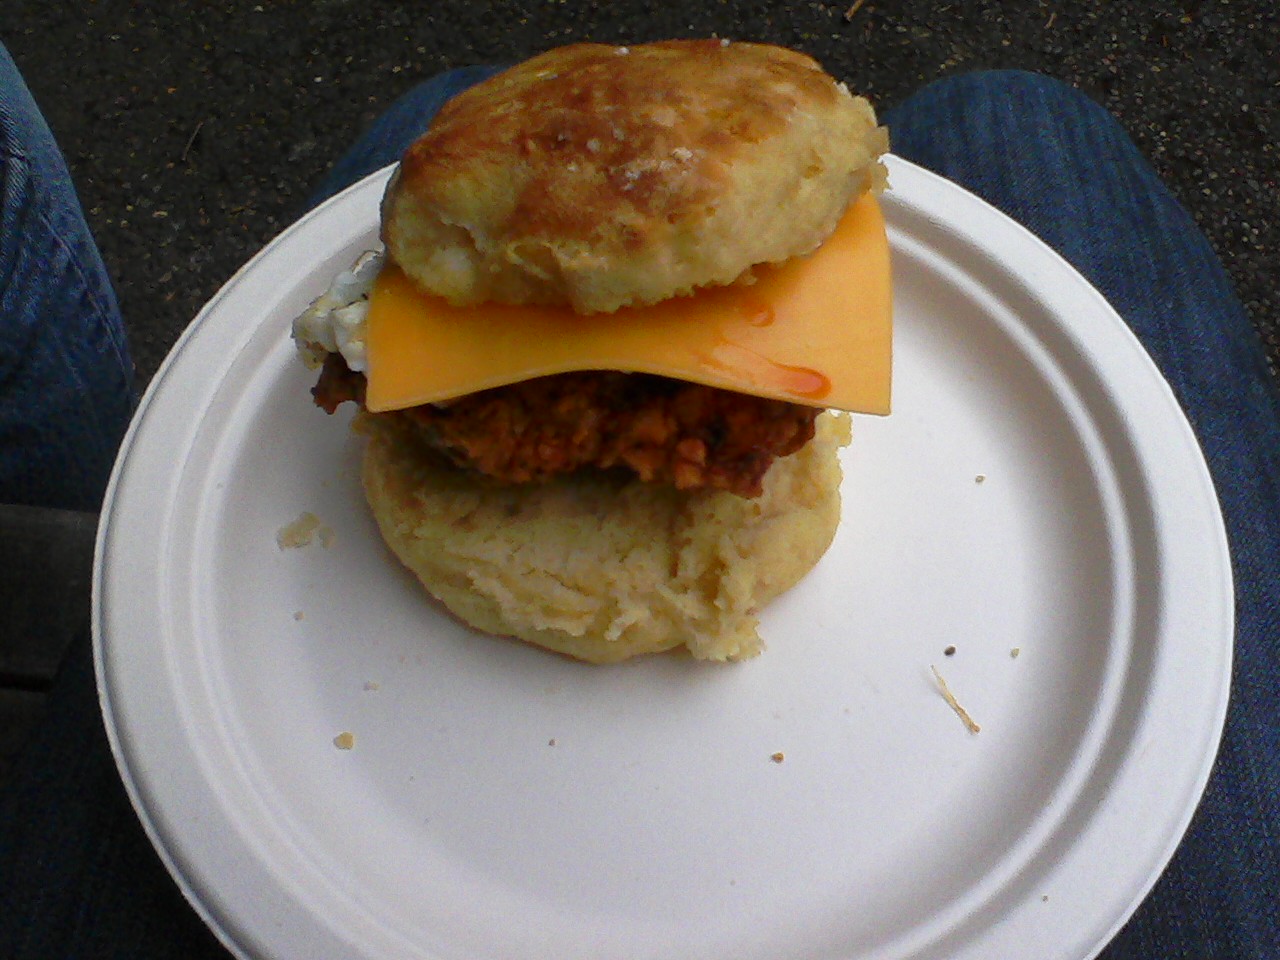
This Saturday, Shawn and I finally took the time to head down to the PSU Farmers Market, which I believe is the largest in Portland. It was a somewhat drizzly morning being that it was the Grand Floral Parade for the Rose Festival, of course it had to be! It worked to our advantage as it wasn't too crowded when we arrived a half hour after it opened. First things first--we had to get food. Shawn opted for the chile and potato filled breakfast burrito from Enchanted Sun Breakfast Burritos. It was a tough decision for me, but ultimately I had to pick the egg, cheese, and fried chicken (?!) biscuit sandwich from Pine State Biscuits. I've been dying to go there and when opportunity presented itself, who was I to say no? And it was as good as everyone says it is. Next time, I'm going for the McIsley, though (Fried chicken with pickles, mustard and honey). Yes, please!
Our real purpose at the market was to find rhubarb, maybe some of our weekly veggies, and definitely some starts for our garden since my poor little starts all died when they weren't able to be planted at the time they were ready (Portland weather FAIL). Apparently Shawn is not much of a fan of my Farmers Market wandering, just like he is not a fan of my grocery store wandering. After a little perusing, I finally found my rhubarb and settled on a genovese basil plant, dill, two types of tomatoes (one called "Mr. Stripey"...tee hee), and a lemon cucumber plant. The rest of the afternoon was spent weeding and planting. I also transplanted the mysterious carrots that have appeared in the beds, and some seeds that didn't need to be started indoors. Busy day and hopefully we'll see the fruits of my labors this summer.
Sunday morning I ended up skipping the run I had planned to go on with friends and instead made us breakfast (worked late Saturday night and 9-mile run was planned for 7am...ugh). It turned out to be a kind of hash with sausage from the market, shallots, spinach, mushrooms, and tomatoes.
For dinner, I planned to do a Mediterranean rub on grilled chicken drumsticks. We had a little buttermilk coleslaw on the side, and what fits naturally with coleslaw and chicken? Biscuits of course! I eventually got to indulge my addiction to carbs and fat with my super simple drop biscuits. I swear I'll never buy that packaged crap again.
As for the rhubarb, I had many ideas, but finally settled on a combination dessert of a tart with oatmeal crisp topping. I wish I had done two things differently: toasted the oats beforehand and cooked the tart crust a little longer. It came out delicious and I'd definitely make something like it again, but I would like a little more of buttery crunch from both the crust and the topping. I used a combination of recipes and ideas, though, so it was bound to need some tweaking.


Rhubarb Tart with Crunchy Oatmeal Crust
Tart Pastry (Pâte Sucrée)
Cook's Illustrated
1 large egg yolk
1 tablespoon heavy cream
1/2 teaspoon vanilla extract
1 1/4 cups unbleached all-purpose flour (6 1/4 ounces)
2/3 cup confectioners' sugar (about 2 3/4 ounces)
1/4 teaspoon table salt
8 tablespoons unsalted butter (1 stick), very cold, cut into 1/2-inch cubes
1. For the tart pastry: Whisk together yolk, cream, and vanilla in small bowl. Combine flour, sugar, and salt in food processor with four 1-second pulses. Scatter butter pieces over flour mixture; pulse to cut butter into flour until mixture resembles coarse meal, about twenty 1-second pulses. With machine running, add egg mixture and process until dough comes together, about 12 seconds. Turn dough onto sheet of plastic wrap and press into 6-inch disk; wrap with plastic wrap and refrigerate at least 1 hour or up to 48 hours.
2. Remove dough from refrigerator (if refrigerated longer than 1 hour, let stand at room temperature until malleable). Unwrap and roll out between lightly floured large sheets of parchment paper or plastic wrap to 11-inch round. (If dough becomes soft and sticky, slip onto baking sheet and refrigerate until workable.) Transfer dough to tart pan by rolling dough loosely over rolling pin and unrolling over 9-inch tart pan with removable bottom. Working around circumference of pan, ease dough into pan by gently lifting dough with one hand while pressing dough into corners and sides of pan with other hand. Press dough into fluted sides of pan, patching breaks or cracks if necessary. (If some edges are too thin, reinforce sides by folding excess dough back on itself.) Run rolling pin over top of tart pan to remove excess dough. Set dough-lined tart pan on baking sheet or large plate and freeze 30 minutes. (Frozen dough-lined tart pan can be wrapped tightly in plastic wrap and frozen up to 1 month.)
3. Meanwhile, adjust oven rack to middle position and heat oven to 375 degrees. Set dough-lined tart pan on baking sheet; lightly spray one side of 18-inch square heavy-duty extra-wide foil with nonstick cooking spray. Press foil greased side down inside frozen tart shell, folding excess foil over edge of pan; fill with metal or ceramic pie weights. Bake until pastry appears dry and pale gold under foil and edges have just begun to color, 20 to 25 minutes, rotating halfway through baking. Remove from oven and carefully remove foil and weights by gathering edges of foil and pulling up and out. Return baking sheet with tart shell to oven and bake until sides are medium golden brown, about 5 minutes; set on wire rack to cool.
Rhubarb Filling
Epicurious.com
1 cup sugar
1/3 cup water
3 3 x 1/2-inch strips lemon peel (yellow part only)
1 cinnamon stick, broken in half
2 pounds fresh rhubarb, trimmed, cut diagonally into 1/2-inch-thick pieces (about 6 cups)
Combine sugar and water in heavy large skillet over low heat. Stir until sugar dissolves. Add lemon peel and cinnamon stick. Increase heat and bring to boil. Add rhubarb and bring to boil. Reduce heat to medium-low. Cover pan and simmer until rhubarb is just beginning to soften, about 5 minutes. Remove pan from heat. Let stand covered until rhubarb is tender, about 15 minutes. Uncover and cool completely.
Using slotted spoon, remove rhubarb from cooking liquid and arrange in concentric circles in crust. Strain cooking liquid into heavy small saucepan. Boil liquid until reduced to 1/4 cup, about 5 minutes. Cool syrup completely. Spoon syrup over rhubarb. (Can be prepared 6 hours ahead. Let stand at room temperature.)*
Oatmeal Topping
Combine about 1 cup of oats with about a 1/4 cup brown sugar, a little cinnamon and a few tablespoons of unsalted butter (cold). Mash together until pretty uniform and top rhubarb. Bake the whole dish on a cookie sheet until bubbly and top is crisp--about a half hour at 350 degrees.
*I omitted this last step of spooning over the rhubarb since I was baking it again and didn't want too much liquid. I reserved the extra sauce and have been using it over yogurt instead.
 |
| Ridiculous. |
Our real purpose at the market was to find rhubarb, maybe some of our weekly veggies, and definitely some starts for our garden since my poor little starts all died when they weren't able to be planted at the time they were ready (Portland weather FAIL). Apparently Shawn is not much of a fan of my Farmers Market wandering, just like he is not a fan of my grocery store wandering. After a little perusing, I finally found my rhubarb and settled on a genovese basil plant, dill, two types of tomatoes (one called "Mr. Stripey"...tee hee), and a lemon cucumber plant. The rest of the afternoon was spent weeding and planting. I also transplanted the mysterious carrots that have appeared in the beds, and some seeds that didn't need to be started indoors. Busy day and hopefully we'll see the fruits of my labors this summer.
 |
| Now those are some nice egg yolks! |
Sunday morning I ended up skipping the run I had planned to go on with friends and instead made us breakfast (worked late Saturday night and 9-mile run was planned for 7am...ugh). It turned out to be a kind of hash with sausage from the market, shallots, spinach, mushrooms, and tomatoes.
 |
| Needing something slightly more healthy than the previously planned biscuits and gravy, this hash kept me energized for most of my 9 miles. |
 |
| I think I could've called this post "Biscuit weekend" instead. |
As for the rhubarb, I had many ideas, but finally settled on a combination dessert of a tart with oatmeal crisp topping. I wish I had done two things differently: toasted the oats beforehand and cooked the tart crust a little longer. It came out delicious and I'd definitely make something like it again, but I would like a little more of buttery crunch from both the crust and the topping. I used a combination of recipes and ideas, though, so it was bound to need some tweaking.

 |
| Love that fluted crust! |

Rhubarb Tart with Crunchy Oatmeal Crust
Tart Pastry (Pâte Sucrée)
Cook's Illustrated
1 large egg yolk
1 tablespoon heavy cream
1/2 teaspoon vanilla extract
1 1/4 cups unbleached all-purpose flour (6 1/4 ounces)
2/3 cup confectioners' sugar (about 2 3/4 ounces)
1/4 teaspoon table salt
8 tablespoons unsalted butter (1 stick), very cold, cut into 1/2-inch cubes
1. For the tart pastry: Whisk together yolk, cream, and vanilla in small bowl. Combine flour, sugar, and salt in food processor with four 1-second pulses. Scatter butter pieces over flour mixture; pulse to cut butter into flour until mixture resembles coarse meal, about twenty 1-second pulses. With machine running, add egg mixture and process until dough comes together, about 12 seconds. Turn dough onto sheet of plastic wrap and press into 6-inch disk; wrap with plastic wrap and refrigerate at least 1 hour or up to 48 hours.
2. Remove dough from refrigerator (if refrigerated longer than 1 hour, let stand at room temperature until malleable). Unwrap and roll out between lightly floured large sheets of parchment paper or plastic wrap to 11-inch round. (If dough becomes soft and sticky, slip onto baking sheet and refrigerate until workable.) Transfer dough to tart pan by rolling dough loosely over rolling pin and unrolling over 9-inch tart pan with removable bottom. Working around circumference of pan, ease dough into pan by gently lifting dough with one hand while pressing dough into corners and sides of pan with other hand. Press dough into fluted sides of pan, patching breaks or cracks if necessary. (If some edges are too thin, reinforce sides by folding excess dough back on itself.) Run rolling pin over top of tart pan to remove excess dough. Set dough-lined tart pan on baking sheet or large plate and freeze 30 minutes. (Frozen dough-lined tart pan can be wrapped tightly in plastic wrap and frozen up to 1 month.)
3. Meanwhile, adjust oven rack to middle position and heat oven to 375 degrees. Set dough-lined tart pan on baking sheet; lightly spray one side of 18-inch square heavy-duty extra-wide foil with nonstick cooking spray. Press foil greased side down inside frozen tart shell, folding excess foil over edge of pan; fill with metal or ceramic pie weights. Bake until pastry appears dry and pale gold under foil and edges have just begun to color, 20 to 25 minutes, rotating halfway through baking. Remove from oven and carefully remove foil and weights by gathering edges of foil and pulling up and out. Return baking sheet with tart shell to oven and bake until sides are medium golden brown, about 5 minutes; set on wire rack to cool.
Rhubarb Filling
Epicurious.com
1 cup sugar
1/3 cup water
3 3 x 1/2-inch strips lemon peel (yellow part only)
1 cinnamon stick, broken in half
2 pounds fresh rhubarb, trimmed, cut diagonally into 1/2-inch-thick pieces (about 6 cups)
Combine sugar and water in heavy large skillet over low heat. Stir until sugar dissolves. Add lemon peel and cinnamon stick. Increase heat and bring to boil. Add rhubarb and bring to boil. Reduce heat to medium-low. Cover pan and simmer until rhubarb is just beginning to soften, about 5 minutes. Remove pan from heat. Let stand covered until rhubarb is tender, about 15 minutes. Uncover and cool completely.
Using slotted spoon, remove rhubarb from cooking liquid and arrange in concentric circles in crust. Strain cooking liquid into heavy small saucepan. Boil liquid until reduced to 1/4 cup, about 5 minutes. Cool syrup completely. Spoon syrup over rhubarb. (Can be prepared 6 hours ahead. Let stand at room temperature.)*
Oatmeal Topping
Combine about 1 cup of oats with about a 1/4 cup brown sugar, a little cinnamon and a few tablespoons of unsalted butter (cold). Mash together until pretty uniform and top rhubarb. Bake the whole dish on a cookie sheet until bubbly and top is crisp--about a half hour at 350 degrees.
*I omitted this last step of spooning over the rhubarb since I was baking it again and didn't want too much liquid. I reserved the extra sauce and have been using it over yogurt instead.
Subscribe to:
Posts (Atom)