Showing posts with label baking. Show all posts
07 August 2012
Perfect Flaky Croissants
It's official. I have baking street cred. On the 4th of July this year while everyone else was getting BBQ side dishes prepared (I did mine the night before), I was on a 10-hour mission toward a major baking feat...homemade croissants.
25 March 2012
Ganache-Filled Cupcakes
Last week was not only St. Patrick's Day, but also one of my best friend's birthdays. Since my husband and I officially became a couple more-or-less on St. Patty's Day (7 years ago!), we didn't always get to celebrate with her. The festivities would also almost always fall on the night before the Shamrock Run, an annual run in downtown Portland that I had done for 7 years. This year, I decided to skip the race since it was the day after St. Patty's Day and I wanted to be there for the party. My friends have an ideal house for a party and there was plenty of Jameson to go around. I wanted to make something fun and delicious to go along with the party's obvious theme. I found this recipe for a so-called "Irish Carbomb" cupcake recipe on Pinterest (follow me!) and thought they would be perfect for the party. I ended up going back to the original Smitten Kitchen recipe and ended up following that one as I couldn't tell what the "adaptation" from the original recipe was and I trust the Smitten Kitchen recipes a little more, having some experience with her recipes.
12 February 2012
Homemade Bagels
Next on my list of baking goals was the bagel. I'm a big fan of bagels and after our bagel experience in NYC, I couldn't satisfy my bagel craving with pretty much anything in Portland. Kettleman Bagels are pretty good, but I just heard they were bought by Noah's, so there goes that option.
15 December 2011
Holiday Cookies
I love the holidays if only for the food. We get the best of the best--ginger, pumpkin, chocolate, molasses--everything that says warmth. Oh yeah, and that's just the dessert side of things. While I don't have the sweet tooth I once had, I still greatly enjoy spending a whole day baking cookies. I took last Friday off to get started on my long list of cookies to be made. Shawn gave me a look when I showed him the eight varieties I planned to make in one day, and I reassured him that I had a plan. A cookie plan. Needless to say, given the great number of refrigerator cookies I had planned, they all didn't get made. Not even close. I still had a great time.
09 November 2011
Light(ish) Oatmeal Chocolate Chip Cookies
The other night I was bored. Shawn had gone off to write (his usual post-dinner routine), and although I had just made a delicious chili dinner, I still had some kitchen time left in me. When I get this baking kick on a random night, I normally don't have all the ingredients I need to make anything. I'm either missing chocolate chips, or oatmeal, or whatever...but this time I checked and had just enough to make oatmeal cookies from the Best Light Recipe cookbook from America's Test Kitchen. So I thought.
03 October 2011
The Saga of the Cookie Monster Cupcakes
I'm never working with blue frosting again. At least not with a piping bag. Below is a picture of the prototype of my sister's 4
26 September 2011
Quick Update
The weather is finally starting to change to fall here in the Pacific NW and with it comes more nights of things like beef stew (below, made for Sunday dinner) and baking.
14 June 2011
Farmers Market Inspired Weekend
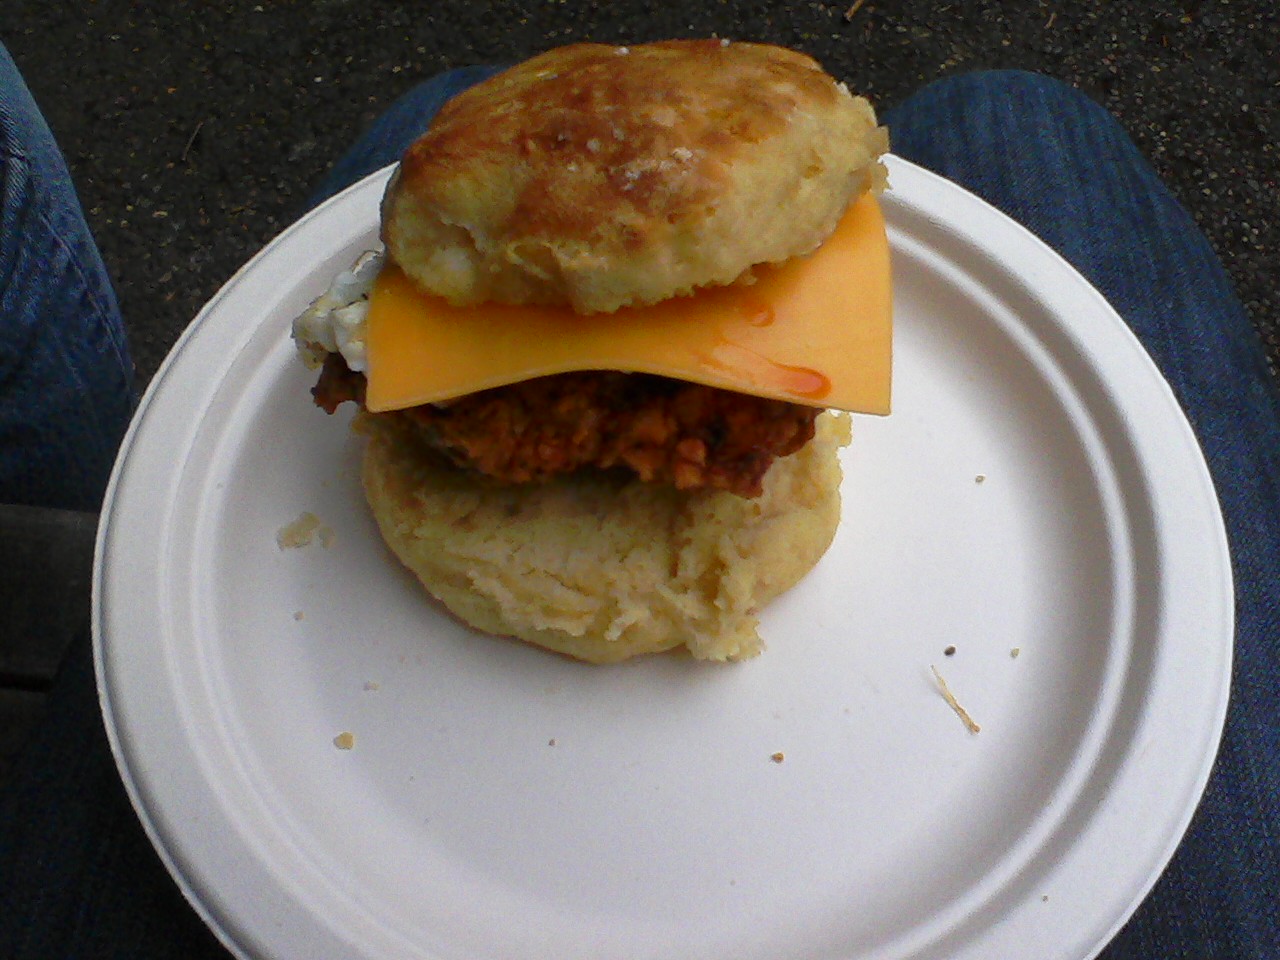
This Saturday, Shawn and I finally took the time to head down to the PSU Farmers Market, which I believe is the largest in Portland. It was a somewhat drizzly morning being that it was the Grand Floral Parade for the Rose Festival, of course it had to be! It worked to our advantage as it wasn't too crowded when we arrived a half hour after it opened. First things first--we had to get food. Shawn opted for the chile and potato filled breakfast burrito from Enchanted Sun Breakfast Burritos. It was a tough decision for me, but ultimately I had to pick the egg, cheese, and fried chicken (?!) biscuit sandwich from Pine State Biscuits. I've been dying to go there and when opportunity presented itself, who was I to say no? And it was as good as everyone says it is. Next time, I'm going for the McIsley, though (Fried chicken with pickles, mustard and honey). Yes, please!
Our real purpose at the market was to find rhubarb, maybe some of our weekly veggies, and definitely some starts for our garden since my poor little starts all died when they weren't able to be planted at the time they were ready (Portland weather FAIL). Apparently Shawn is not much of a fan of my Farmers Market wandering, just like he is not a fan of my grocery store wandering. After a little perusing, I finally found my rhubarb and settled on a genovese basil plant, dill, two types of tomatoes (one called "Mr. Stripey"...tee hee), and a lemon cucumber plant. The rest of the afternoon was spent weeding and planting. I also transplanted the mysterious carrots that have appeared in the beds, and some seeds that didn't need to be started indoors. Busy day and hopefully we'll see the fruits of my labors this summer.
Sunday morning I ended up skipping the run I had planned to go on with friends and instead made us breakfast (worked late Saturday night and 9-mile run was planned for 7am...ugh). It turned out to be a kind of hash with sausage from the market, shallots, spinach, mushrooms, and tomatoes.
For dinner, I planned to do a Mediterranean rub on grilled chicken drumsticks. We had a little buttermilk coleslaw on the side, and what fits naturally with coleslaw and chicken? Biscuits of course! I eventually got to indulge my addiction to carbs and fat with my super simple drop biscuits. I swear I'll never buy that packaged crap again.
As for the rhubarb, I had many ideas, but finally settled on a combination dessert of a tart with oatmeal crisp topping. I wish I had done two things differently: toasted the oats beforehand and cooked the tart crust a little longer. It came out delicious and I'd definitely make something like it again, but I would like a little more of buttery crunch from both the crust and the topping. I used a combination of recipes and ideas, though, so it was bound to need some tweaking.
Rhubarb Tart with Crunchy Oatmeal Crust
Tart Pastry (Pâte Sucrée)
Cook's Illustrated
1 large egg yolk
1 tablespoon heavy cream
1/2 teaspoon vanilla extract
1 1/4 cups unbleached all-purpose flour (6 1/4 ounces)
2/3 cup confectioners' sugar (about 2 3/4 ounces)
1/4 teaspoon table salt
8 tablespoons unsalted butter (1 stick), very cold, cut into 1/2-inch cubes
1. For the tart pastry: Whisk together yolk, cream, and vanilla in small bowl. Combine flour, sugar, and salt in food processor with four 1-second pulses. Scatter butter pieces over flour mixture; pulse to cut butter into flour until mixture resembles coarse meal, about twenty 1-second pulses. With machine running, add egg mixture and process until dough comes together, about 12 seconds. Turn dough onto sheet of plastic wrap and press into 6-inch disk; wrap with plastic wrap and refrigerate at least 1 hour or up to 48 hours.
2. Remove dough from refrigerator (if refrigerated longer than 1 hour, let stand at room temperature until malleable). Unwrap and roll out between lightly floured large sheets of parchment paper or plastic wrap to 11-inch round. (If dough becomes soft and sticky, slip onto baking sheet and refrigerate until workable.) Transfer dough to tart pan by rolling dough loosely over rolling pin and unrolling over 9-inch tart pan with removable bottom. Working around circumference of pan, ease dough into pan by gently lifting dough with one hand while pressing dough into corners and sides of pan with other hand. Press dough into fluted sides of pan, patching breaks or cracks if necessary. (If some edges are too thin, reinforce sides by folding excess dough back on itself.) Run rolling pin over top of tart pan to remove excess dough. Set dough-lined tart pan on baking sheet or large plate and freeze 30 minutes. (Frozen dough-lined tart pan can be wrapped tightly in plastic wrap and frozen up to 1 month.)
3. Meanwhile, adjust oven rack to middle position and heat oven to 375 degrees. Set dough-lined tart pan on baking sheet; lightly spray one side of 18-inch square heavy-duty extra-wide foil with nonstick cooking spray. Press foil greased side down inside frozen tart shell, folding excess foil over edge of pan; fill with metal or ceramic pie weights. Bake until pastry appears dry and pale gold under foil and edges have just begun to color, 20 to 25 minutes, rotating halfway through baking. Remove from oven and carefully remove foil and weights by gathering edges of foil and pulling up and out. Return baking sheet with tart shell to oven and bake until sides are medium golden brown, about 5 minutes; set on wire rack to cool.
Rhubarb Filling
Epicurious.com
1 cup sugar
1/3 cup water
3 3 x 1/2-inch strips lemon peel (yellow part only)
1 cinnamon stick, broken in half
2 pounds fresh rhubarb, trimmed, cut diagonally into 1/2-inch-thick pieces (about 6 cups)
Combine sugar and water in heavy large skillet over low heat. Stir until sugar dissolves. Add lemon peel and cinnamon stick. Increase heat and bring to boil. Add rhubarb and bring to boil. Reduce heat to medium-low. Cover pan and simmer until rhubarb is just beginning to soften, about 5 minutes. Remove pan from heat. Let stand covered until rhubarb is tender, about 15 minutes. Uncover and cool completely.
Using slotted spoon, remove rhubarb from cooking liquid and arrange in concentric circles in crust. Strain cooking liquid into heavy small saucepan. Boil liquid until reduced to 1/4 cup, about 5 minutes. Cool syrup completely. Spoon syrup over rhubarb. (Can be prepared 6 hours ahead. Let stand at room temperature.)*
Oatmeal Topping
Combine about 1 cup of oats with about a 1/4 cup brown sugar, a little cinnamon and a few tablespoons of unsalted butter (cold). Mash together until pretty uniform and top rhubarb. Bake the whole dish on a cookie sheet until bubbly and top is crisp--about a half hour at 350 degrees.
*I omitted this last step of spooning over the rhubarb since I was baking it again and didn't want too much liquid. I reserved the extra sauce and have been using it over yogurt instead.

![]() |
| Ridiculous. |
Our real purpose at the market was to find rhubarb, maybe some of our weekly veggies, and definitely some starts for our garden since my poor little starts all died when they weren't able to be planted at the time they were ready (Portland weather FAIL). Apparently Shawn is not much of a fan of my Farmers Market wandering, just like he is not a fan of my grocery store wandering. After a little perusing, I finally found my rhubarb and settled on a genovese basil plant, dill, two types of tomatoes (one called "Mr. Stripey"...tee hee), and a lemon cucumber plant. The rest of the afternoon was spent weeding and planting. I also transplanted the mysterious carrots that have appeared in the beds, and some seeds that didn't need to be started indoors. Busy day and hopefully we'll see the fruits of my labors this summer.
| Now those are some nice egg yolks! |
Sunday morning I ended up skipping the run I had planned to go on with friends and instead made us breakfast (worked late Saturday night and 9-mile run was planned for 7am...ugh). It turned out to be a kind of hash with sausage from the market, shallots, spinach, mushrooms, and tomatoes.
| Needing something slightly more healthy than the previously planned biscuits and gravy, this hash kept me energized for most of my 9 miles. |
| I think I could've called this post "Biscuit weekend" instead. |
As for the rhubarb, I had many ideas, but finally settled on a combination dessert of a tart with oatmeal crisp topping. I wish I had done two things differently: toasted the oats beforehand and cooked the tart crust a little longer. It came out delicious and I'd definitely make something like it again, but I would like a little more of buttery crunch from both the crust and the topping. I used a combination of recipes and ideas, though, so it was bound to need some tweaking.
| Love that fluted crust! |
Rhubarb Tart with Crunchy Oatmeal Crust
Tart Pastry (Pâte Sucrée)
Cook's Illustrated
1 large egg yolk
1 tablespoon heavy cream
1/2 teaspoon vanilla extract
1 1/4 cups unbleached all-purpose flour (6 1/4 ounces)
2/3 cup confectioners' sugar (about 2 3/4 ounces)
1/4 teaspoon table salt
8 tablespoons unsalted butter (1 stick), very cold, cut into 1/2-inch cubes
1. For the tart pastry: Whisk together yolk, cream, and vanilla in small bowl. Combine flour, sugar, and salt in food processor with four 1-second pulses. Scatter butter pieces over flour mixture; pulse to cut butter into flour until mixture resembles coarse meal, about twenty 1-second pulses. With machine running, add egg mixture and process until dough comes together, about 12 seconds. Turn dough onto sheet of plastic wrap and press into 6-inch disk; wrap with plastic wrap and refrigerate at least 1 hour or up to 48 hours.
2. Remove dough from refrigerator (if refrigerated longer than 1 hour, let stand at room temperature until malleable). Unwrap and roll out between lightly floured large sheets of parchment paper or plastic wrap to 11-inch round. (If dough becomes soft and sticky, slip onto baking sheet and refrigerate until workable.) Transfer dough to tart pan by rolling dough loosely over rolling pin and unrolling over 9-inch tart pan with removable bottom. Working around circumference of pan, ease dough into pan by gently lifting dough with one hand while pressing dough into corners and sides of pan with other hand. Press dough into fluted sides of pan, patching breaks or cracks if necessary. (If some edges are too thin, reinforce sides by folding excess dough back on itself.) Run rolling pin over top of tart pan to remove excess dough. Set dough-lined tart pan on baking sheet or large plate and freeze 30 minutes. (Frozen dough-lined tart pan can be wrapped tightly in plastic wrap and frozen up to 1 month.)
3. Meanwhile, adjust oven rack to middle position and heat oven to 375 degrees. Set dough-lined tart pan on baking sheet; lightly spray one side of 18-inch square heavy-duty extra-wide foil with nonstick cooking spray. Press foil greased side down inside frozen tart shell, folding excess foil over edge of pan; fill with metal or ceramic pie weights. Bake until pastry appears dry and pale gold under foil and edges have just begun to color, 20 to 25 minutes, rotating halfway through baking. Remove from oven and carefully remove foil and weights by gathering edges of foil and pulling up and out. Return baking sheet with tart shell to oven and bake until sides are medium golden brown, about 5 minutes; set on wire rack to cool.
Rhubarb Filling
Epicurious.com
1 cup sugar
1/3 cup water
3 3 x 1/2-inch strips lemon peel (yellow part only)
1 cinnamon stick, broken in half
2 pounds fresh rhubarb, trimmed, cut diagonally into 1/2-inch-thick pieces (about 6 cups)
Combine sugar and water in heavy large skillet over low heat. Stir until sugar dissolves. Add lemon peel and cinnamon stick. Increase heat and bring to boil. Add rhubarb and bring to boil. Reduce heat to medium-low. Cover pan and simmer until rhubarb is just beginning to soften, about 5 minutes. Remove pan from heat. Let stand covered until rhubarb is tender, about 15 minutes. Uncover and cool completely.
Using slotted spoon, remove rhubarb from cooking liquid and arrange in concentric circles in crust. Strain cooking liquid into heavy small saucepan. Boil liquid until reduced to 1/4 cup, about 5 minutes. Cool syrup completely. Spoon syrup over rhubarb. (Can be prepared 6 hours ahead. Let stand at room temperature.)*
Oatmeal Topping
Combine about 1 cup of oats with about a 1/4 cup brown sugar, a little cinnamon and a few tablespoons of unsalted butter (cold). Mash together until pretty uniform and top rhubarb. Bake the whole dish on a cookie sheet until bubbly and top is crisp--about a half hour at 350 degrees.
*I omitted this last step of spooning over the rhubarb since I was baking it again and didn't want too much liquid. I reserved the extra sauce and have been using it over yogurt instead.
31 May 2011
Absurdly Decadent Cupcakes
How is is possible to make a chocolate ganache cupcake even more sinfully delicious? Just add salted caramel and potato chips. Yes, potato chips. I was reading an email from Portland Monthly about Portland's microbakery and noticed these little treats. I had to make them, oh yes, I had to make them.
I started with the Cook's Illustrated recipe for chocolate ganache cupcakes.
| Fresh out of the oven |
| A close-up of just how moist and chocolatey these suckers are |
Then took a handful of Lay's Wavy potato chips and dipped them in the chocolate buttercream frosting I made (ran out of pure chocolate), and threw on a sprinkle of kosher salt for good measure.
| Good idea to let these cool on wax paper so you don't lose the chocolate |
| Don't take your caramel off the stove before it turns a nice, deep amber color or it'll lack the depth of flavor you want |
| Before they go completely overboard |
| Little cupcakes waiting for the caramel storm |
| Probably a good idea to do this over the wax paper or something you can throw away |
| Even two days after baking these, the cupcakes are still moist |
For those of you not able to purchase one at Sugarcube in Portland, here are the recipes I used.
Ultimate Chocolate Cupcakes with Ganache Filling
From Cooksillustrated.comUse a high quality bittersweet or semisweet chocolate for this recipe, such as one of the test kitchen's favorite baking chocolates, Callebaut Intense Dark Chocolate L-60-40NV or Ghirardelli Bittersweet Chocolate Baking Bar. Though we highly recommend the ganache filling, you can omit it for a more traditional cupcake. The cupcakes can be made up to 24 hours in advance and stored unfrosted in an airtight container.
INGREDIENTS
Ganache Filling
2 ounces bittersweet chocolate , chopped fine (see note)
1/4 cup heavy cream
1 tablespoon confectioners' sugar
Chocolate Cupcakes
3 ounces bittersweet chocolate , chopped fine (see note)
1/3 cup (1 ounce) Dutch-processed cocoa
3/4 cup hot coffee
3/4 cup (4 1/8 ounces) bread flour
3/4 cup (5 1/4 ounces) granulated sugar
1/2 teaspoon table salt
1/2 teaspoon baking soda
6 tablespoons vegetable oil
2 large eggs
2 teaspoons white vinegar
1 teaspoon vanilla extract
1 recipe Frosting
INSTRUCTIONS
1. FOR GANACHE FILLING: Place chocolate, cream, and confectioners sugar in medium microwave-safe bowl. Heat in microwave on high power until mixture is warm to touch, 20 to 30 seconds. Whisk until smooth; transfer bowl to refrigerator and let stand until just chilled, no longer than 30 minutes.
2. FOR CUPCAKES: Adjust oven rack to middle position and heat oven to 350 degrees. Line standard-size muffin pan with baking-cup liners. Place chocolate and cocoa in medium bowl. Pour hot coffee over mixture and whisk until smooth. Set in refrigerator to cool completely, about 20 minutes. Whisk flour, sugar, salt, and baking soda together in medium bowl; set aside.
3. Whisk oil, eggs, vinegar, and vanilla into cooled chocolate-cocoa mixture until smooth. Add flour mixture and whisk until smooth.
4. Divide batter evenly among muffin pan cups. Place one slightly rounded teaspoon ganache filling on top of each cupcake. Bake until cupcakes are set and just firm to touch, 17 to 19 minutes. Cool cupcakes in muffin pan on wire rack until cool enough to handle, about 10 minutes. Carefully lift each cupcake from muffin pan and set on wire rack. Cool to room temperature before frosting, about 1 hour.
5. TO FROST: Mound 2 to 3 tablespoons frosting on center of each cupcake. Using small icing spatula or butter knife, spread frosting to edge of cupcake, leaving slight mound in center.
Easy Caramel Sauce*
From Cooksillustrated.com
INGREDIENTS
1/2 cup water
1 cup granulated sugar
1 cup heavy cream
1/8 teaspoon table salt
1/2 teaspoon vanilla extract
1/2 teaspoon lemon juice from 1 lemon
1 teaspoon high quality salt
INSTRUCTIONS
1. Place water in heavy-bottomed 2-quart saucepan; pour sugar in center of pan, taking care not to let sugar crystals adhere to sides of pan. Cover and bring mixture to boil over high heat; once boiling, uncover and continue to boil until syrup is thick and straw-colored (syrup should register 300 degrees on candy thermometer), about 7 minutes. Reduce heat to medium and continue to cook until syrup is deep amber (syrup should register 350 degrees on candy thermometer), about 1 to 2 minutes.
2. Meanwhile, bring cream and salt to simmer in small saucepan over high heat (if cream boils before sugar reaches deep amber color, remove cream from heat and cover to keep warm).
3. Remove sugar syrup from heat; very carefully pour about one quarter of hot cream into it (mixture will bubble vigorously), and let bubbling subside. Add remaining cream, vanilla, and lemon juice; whisk until sauce is smooth. (Sauce can be cooled and refrigerated in airtight container for up to 2 weeks.)
*I halved this recipe and had more than enough to cover the cupcakes. Make sure to use the smallest pot you have or the water will evaporate too fast.
24 May 2011
The Mac and Cheese Off
The gloves came off last weekend and a showdown was had the Rice house...Baked mac versus Stovetop mac. Which would prevail?
I used Steve's Famous Macaroni and Cheese for the baked version, and Eve-Maridy found a creamy stovetop mac from the Food Network's Alton Brown. Since we had the showdown on a Friday right after work and baked mac can take some time, I prepared mine up until the baking part and stuck it in the freezer. I also made breadcrumbs out of leftover Little T focaccia we had from earlier in the week and integrated the chili powder that way.
Two things were discovered from this challenge. One--the two types of mac are WAY too different to really declare a clear champion. Mine with its crispy crust and four types of cheese were nothing like her super creamy, sharp cheddar goodness...each bite made me want to pick a different winner. Two--despite my effort to bring the partially made dish of mac to room temperature before sticking it in the hot oven, there were some cold parts in the middle. The top was divine--so bubbly, melty, and crunchy. The middle made me cringe. It was by far NOT my best work (sorry Steve-o). So, I suggest not only letting it come as close to room temperature as possible, but also covering it with aluminum foil for the first 20 minutes of baking, then removing the foil for an additional 20-25 minutes until crisp. Sad it wasn't my best effort, but it was still a delicious night with great friends!
![]() |
| Eve-Maridy's creamy mac |
![]() |
| My baked mac |
![]() |
| Creamy and baked coexisting peacefully |
To top it all off, I made a skillet apple pie (now THAT turned out perfectly), and we watched Behind the Mask: The Rise of Leslie Vernon (filmed right here in Portland, Oregon!).
![]() |
| Skillet apple pie right out of the oven |
![]() |
| Even better with some ice cream |
![]() |
| Perfect ending to a great night |
Skillet Apple Pie
by Cook's Illustrated
SERVES 6 TO 8
If your skillet is not heatproof, precook the apples and stir in the cider mixture as instructed, then transfer the apples to a 13- by 9-inch baking dish. Roll out the dough to a 13- by 9-inch rectangle and bake it as instructed. If you do not have apple cider, reduced apple juice may be used as a substitute—simmer 1 cup apple juice in a small saucepan over medium heat until reduced to 1/2 cup (about 10 minutes). Serve the pie warm or at room temperature with vanilla ice cream or whipped cream. Use a combination of sweet, crisp apples such as Golden Delicious and firm, tart apples such as Cortland or Empire.
INGREDIENTS
Crust
1cup unbleached all-purpose flour (5 ounces), plus more for dusting work surface
1tablespoon sugar
1/2teaspoon table salt
2tablespoons vegetable shortening , chilled
6tablespoons (3/4 stick) cold unsalted butter , cut into 1/4-inch pieces
3–4tablespoons ice water
Filling
1/2cup apple cider (see note)
1/3cup maple syrup
2tablespoons fresh lemon juice from 1 lemon
2teaspoons cornstarch
1/8teaspoon ground cinnamon (optional)
2tablespoons unsalted butter
2 1/2pounds sweet apples and tart apples (about 5 medium), peeled, cored, halved, and cut into 1/2-inch-thick wedges (see note)
1 egg white , lightly beaten
2teaspoons sugar
INSTRUCTIONS
1. FOR THE CRUST: Pulse flour, sugar, and salt in food processor until combined. Add shortening and process until mixture has texture of coarse sand, about ten 1-second pulses. Scatter butter pieces over flour mixture and process until mixture is pale yellow and resembles coarse crumbs, with butter bits no larger than small peas, about ten 1-second pulses. Transfer mixture to medium bowl.
2. Sprinkle 3 tablespoons ice water over mixture. With blade of rubber spatula, use folding motion to mix. Press down on dough with broad side of spatula until dough sticks together, adding up to 1 tablespoon more ice water if dough does not come
together. Turn dough out onto sheet of plastic wrap and flatten into 4-inch disk. Wrap dough and refrigerate 30 minutes, or up to 2 days, before rolling out. (If dough is refrigerated longer than 1 hour, let stand at room temperature until malleable.)
3. FOR THE FILLING: Adjust oven rack to upper-middle position (between 7 and 9 inches from heating element) and heat oven to 500 degrees. Whisk cider, syrup, lemon juice, cornstarch, and cinnamon (if using) together in medium bowl until smooth. Heat butter in 12-inch heatproof skillet over medium-high heat. When foaming subsides, add apples and cook, stirring 2 or 3 times until apples begin to caramelize, about 5 minutes. (Do not fully cook apples.) Remove pan from heat, add cider mixture, and gently stir until apples are well coated. Set aside to cool slightly.
4. TO ASSEMBLE AND BAKE: Roll out dough on lightly floured work surface, or between 2 large sheets of plastic wrap, to 11-inch circle. Roll dough loosely around rolling pin and unroll over apple filling. Brush dough with egg white and sprinkle with sugar. With sharp knife, gently cut dough into 6 pieces by making 1 vertical cut followed by 2 evenly spaced horizontal cuts (perpendicular to first cut). Bake until apples are tender and crust is a deep golden brown, about 20 minutes. Let cool 15 minutes; serve.
If your skillet is not heatproof, precook the apples and stir in the cider mixture as instructed, then transfer the apples to a 13- by 9-inch baking dish. Roll out the dough to a 13- by 9-inch rectangle and bake it as instructed. If you do not have apple cider, reduced apple juice may be used as a substitute—simmer 1 cup apple juice in a small saucepan over medium heat until reduced to 1/2 cup (about 10 minutes). Serve the pie warm or at room temperature with vanilla ice cream or whipped cream. Use a combination of sweet, crisp apples such as Golden Delicious and firm, tart apples such as Cortland or Empire.
INGREDIENTS
Crust
1cup unbleached all-purpose flour (5 ounces), plus more for dusting work surface
1tablespoon sugar
1/2teaspoon table salt
2tablespoons vegetable shortening , chilled
6tablespoons (3/4 stick) cold unsalted butter , cut into 1/4-inch pieces
3–4tablespoons ice water
Filling
1/2cup apple cider (see note)
1/3cup maple syrup
2tablespoons fresh lemon juice from 1 lemon
2teaspoons cornstarch
1/8teaspoon ground cinnamon (optional)
2tablespoons unsalted butter
2 1/2pounds sweet apples and tart apples (about 5 medium), peeled, cored, halved, and cut into 1/2-inch-thick wedges (see note)
1 egg white , lightly beaten
2teaspoons sugar
INSTRUCTIONS
1. FOR THE CRUST: Pulse flour, sugar, and salt in food processor until combined. Add shortening and process until mixture has texture of coarse sand, about ten 1-second pulses. Scatter butter pieces over flour mixture and process until mixture is pale yellow and resembles coarse crumbs, with butter bits no larger than small peas, about ten 1-second pulses. Transfer mixture to medium bowl.
2. Sprinkle 3 tablespoons ice water over mixture. With blade of rubber spatula, use folding motion to mix. Press down on dough with broad side of spatula until dough sticks together, adding up to 1 tablespoon more ice water if dough does not come
together. Turn dough out onto sheet of plastic wrap and flatten into 4-inch disk. Wrap dough and refrigerate 30 minutes, or up to 2 days, before rolling out. (If dough is refrigerated longer than 1 hour, let stand at room temperature until malleable.)
3. FOR THE FILLING: Adjust oven rack to upper-middle position (between 7 and 9 inches from heating element) and heat oven to 500 degrees. Whisk cider, syrup, lemon juice, cornstarch, and cinnamon (if using) together in medium bowl until smooth. Heat butter in 12-inch heatproof skillet over medium-high heat. When foaming subsides, add apples and cook, stirring 2 or 3 times until apples begin to caramelize, about 5 minutes. (Do not fully cook apples.) Remove pan from heat, add cider mixture, and gently stir until apples are well coated. Set aside to cool slightly.
4. TO ASSEMBLE AND BAKE: Roll out dough on lightly floured work surface, or between 2 large sheets of plastic wrap, to 11-inch circle. Roll dough loosely around rolling pin and unroll over apple filling. Brush dough with egg white and sprinkle with sugar. With sharp knife, gently cut dough into 6 pieces by making 1 vertical cut followed by 2 evenly spaced horizontal cuts (perpendicular to first cut). Bake until apples are tender and crust is a deep golden brown, about 20 minutes. Let cool 15 minutes; serve.
03 February 2011
Sea Salt Chocolate Chip Cookies
This weekend was our annual group trip to Mt. Hood. We had a record number this year of 10 people and a shorter weekend than usual, so meals were divided up further. We tacked on to Michael's delicious dinner of lamb and polenta lasagna (weighing in at about 8 lbs, not counting the pan!) and made caesar salad, bread, and dessert. But who cares about salad?? Let's get on to the dessert.
Since I knew we'd be out in the cold, snowy weather (ha ha...right), I thought we needed a warm dessert. And what's better than a warm chocolate chip cookie? So I went scouring the internet for a great chocolate chip and sea salt recipe and found an article from the NY Times about the perfect chocolate chip cookie. The article is actually pretty interesting if you're into that sort of thing, so I recommend reading it if you have time. I found a lot of other salted chocolate chip cookie recipes that were thin and crisp--they have their place too--but for a heaping scoop of ice cream and some Holy Kakow, you need a big, soft cookie.
Chocolate Chip Cookies
Published: July 9, 2008 in NY Times
Adapted from Jacques Torres
Time: 45 minutes (for 1 6-cookie batch), plus at least 24 hours’ chilling
2 cups minus 2 tablespoons (8 1/2 ounces) cake flour*
1 2/3 cups (8 1/2 ounces) bread flour
1 1/4 teaspoons baking soda
1 1/2 teaspoons baking powder
1 1/2 teaspoons coarse salt
2 1/2 sticks (1 1/4 cups) unsalted butter
1 1/4 cups (10 ounces) light brown sugar
1 cup plus 2 tablespoons (8 ounces) granulated sugar
2 large eggs
2 teaspoons natural vanilla extract
1 1/4 pounds bittersweet chocolate disks or fèves, at least 60 percent cacao content (Carmel's note: did not use disks and it turned out fine...the cacao content is VERY important, though)
Sea salt (Carmel's 2nd note: I bought a small amount of grey sea salt from the bulk spices section of New Seasons--economical and delicious!)
1. Sift flours, baking soda, baking powder and salt into a bowl. Set aside.
2. Using a mixer fitted with paddle attachment,** cream butter and sugars together until very light, about 5 minutes. Add eggs, one at a time, mixing well after each addition. Stir in the vanilla. Reduce speed to low, add dry ingredients and mix until just combined, 5 to 10 seconds. Drop chocolate pieces in and incorporate them without breaking them. Press plastic wrap against dough and refrigerate for 24 to 36 hours. Dough may be used in batches, and can be refrigerated for up to 72 hours.
3. When ready to bake, preheat oven to 350 degrees. Line a baking sheet with parchment paper or a nonstick baking mat. Set aside.
4. Scoop 6 3 1/2-ounce mounds of dough (the size of generous golf balls) onto baking sheet, making sure to turn horizontally any chocolate pieces that are poking up; it will make for a more attractive cookie. Sprinkle lightly with sea salt and bake until golden brown but still soft, 18 to 20 minutes. Transfer sheet to a wire rack for 10 minutes, then slip cookies onto another rack to cool a bit more. Repeat with remaining dough, or reserve dough, refrigerated, for baking remaining batches the next day. Eat warm, with a big napkin.
Yield: 1 1/2 dozen 5-inch cookies.
*Given the very specific measurements of flour in this recipe, I highly recommend using a food scale if you have one.
**I don't have a paddle attachment for my (ahem) economical stand mixer, but a hand mixer works just fine. But be patient as creaming the sugars and butter may take a few extra minutes.
Since I knew we'd be out in the cold, snowy weather (ha ha...right), I thought we needed a warm dessert. And what's better than a warm chocolate chip cookie? So I went scouring the internet for a great chocolate chip and sea salt recipe and found an article from the NY Times about the perfect chocolate chip cookie. The article is actually pretty interesting if you're into that sort of thing, so I recommend reading it if you have time. I found a lot of other salted chocolate chip cookie recipes that were thin and crisp--they have their place too--but for a heaping scoop of ice cream and some Holy Kakow, you need a big, soft cookie.
Chocolate Chip Cookies
Published: July 9, 2008 in NY Times
Adapted from Jacques Torres
Time: 45 minutes (for 1 6-cookie batch), plus at least 24 hours’ chilling
2 cups minus 2 tablespoons (8 1/2 ounces) cake flour*
1 2/3 cups (8 1/2 ounces) bread flour
1 1/4 teaspoons baking soda
1 1/2 teaspoons baking powder
1 1/2 teaspoons coarse salt
2 1/2 sticks (1 1/4 cups) unsalted butter
1 1/4 cups (10 ounces) light brown sugar
1 cup plus 2 tablespoons (8 ounces) granulated sugar
2 large eggs
2 teaspoons natural vanilla extract
1 1/4 pounds bittersweet chocolate disks or fèves, at least 60 percent cacao content (Carmel's note: did not use disks and it turned out fine...the cacao content is VERY important, though)
Sea salt (Carmel's 2nd note: I bought a small amount of grey sea salt from the bulk spices section of New Seasons--economical and delicious!)
1. Sift flours, baking soda, baking powder and salt into a bowl. Set aside.
2. Using a mixer fitted with paddle attachment,** cream butter and sugars together until very light, about 5 minutes. Add eggs, one at a time, mixing well after each addition. Stir in the vanilla. Reduce speed to low, add dry ingredients and mix until just combined, 5 to 10 seconds. Drop chocolate pieces in and incorporate them without breaking them. Press plastic wrap against dough and refrigerate for 24 to 36 hours. Dough may be used in batches, and can be refrigerated for up to 72 hours.
3. When ready to bake, preheat oven to 350 degrees. Line a baking sheet with parchment paper or a nonstick baking mat. Set aside.
4. Scoop 6 3 1/2-ounce mounds of dough (the size of generous golf balls) onto baking sheet, making sure to turn horizontally any chocolate pieces that are poking up; it will make for a more attractive cookie. Sprinkle lightly with sea salt and bake until golden brown but still soft, 18 to 20 minutes. Transfer sheet to a wire rack for 10 minutes, then slip cookies onto another rack to cool a bit more. Repeat with remaining dough, or reserve dough, refrigerated, for baking remaining batches the next day. Eat warm, with a big napkin.
Yield: 1 1/2 dozen 5-inch cookies.
*Given the very specific measurements of flour in this recipe, I highly recommend using a food scale if you have one.
**I don't have a paddle attachment for my (ahem) economical stand mixer, but a hand mixer works just fine. But be patient as creaming the sugars and butter may take a few extra minutes.
03 January 2011
NYE Baking Extravaganza!
Happy 2011!
For New Year's Eve this year, we decided to have our friends over rather than going out spending tons of money trying to figure out the place to be at midnight. Too much stress...So, we had a party. Not at all stressful. Ha ha. For some reason, I wanted to add to that and start a couple of projects for the next day. Shawn requested that our first meal of 2011 be beef stew, as he's been craving it for a few weeks now and it seemed like a good do-nothing kind of day meal. Clearly I needed to make a loaf of no-knead bread.
And since we're trying to be conservative with our budget, but I still wanted a good breakfast on Saturday, I made my first attempt at English muffins. This was all on top of the other snacks I was making for that evening. Surprisingly, I had about an hour free before anyone arrived. I must be getting better at this planning thing.
America's Test Kitchen Family Baking Book English muffins
1 recipe for American sandwich bread
Cornmeal
First you have to make the bread and let it do its rising thing (boring pics I've posted a bajillion times). Then you roll the bread into a 12-inch log and cut into 12 equal pieces. Working with one piece at a time, work each one carefully into small rolls. Spray with vegetable oil, cover with plastic on cornmeal-dusted pan and do some more waiting.
So, they weren't what I expected. I know a couple of things I did wrong now and will try again sometime soon. They tasted good, but just had more of a bread feel than English muffin feel. Oh well, live and learn.
For New Year's Eve this year, we decided to have our friends over rather than going out spending tons of money trying to figure out the place to be at midnight. Too much stress...So, we had a party. Not at all stressful. Ha ha. For some reason, I wanted to add to that and start a couple of projects for the next day. Shawn requested that our first meal of 2011 be beef stew, as he's been craving it for a few weeks now and it seemed like a good do-nothing kind of day meal. Clearly I needed to make a loaf of no-knead bread.
And since we're trying to be conservative with our budget, but I still wanted a good breakfast on Saturday, I made my first attempt at English muffins. This was all on top of the other snacks I was making for that evening. Surprisingly, I had about an hour free before anyone arrived. I must be getting better at this planning thing.
America's Test Kitchen Family Baking Book English muffins
1 recipe for American sandwich bread
Cornmeal
First you have to make the bread and let it do its rising thing (boring pics I've posted a bajillion times). Then you roll the bread into a 12-inch log and cut into 12 equal pieces. Working with one piece at a time, work each one carefully into small rolls. Spray with vegetable oil, cover with plastic on cornmeal-dusted pan and do some more waiting.
| Here we are....waiting. After they have doubled in size again, flatten each into about 3/4" disk, and sprinkle liberally with more cornmeal. Cover with plastic and heat up your skillet. |
| Woo hoo! We're finally grilling. Takes 3-6 minutes for the first side. They should be deep brown (not burnt) before flipping. |
| You have to keep pressing them down so they don't become little domes. I think I messed this part up and pressed down too much, because there was a serious lack of nooks and crannies. |
| Right after they come off the grill (each batch, not the whole lot), put them in a 350 degree oven. Now, I know I messed this part up. I waited too long and I think that was part of their demise. |
21 October 2010
Wedding Project
Last weekend, I became Mrs. Montgomery. It was a spectacular weekend full of good friends and family, great food, and plenty of delicious wine. A couple of days before the wedding after the majority of our family had arrived, we had a little get together at our house so that everyone could meet and relax a bit before the wedding madness began.
Since Shawn's niece was visiting as well, and I know that hanging out with a bunch of adults all weekend can get a little boring, I thought of a fun project we could do together--make a 3-layer Rice Krispie treat cake for the rehearsal dinner.
7 recipes of Rice Krispie treats later, it was complete.
Since Shawn's niece was visiting as well, and I know that hanging out with a bunch of adults all weekend can get a little boring, I thought of a fun project we could do together--make a 3-layer Rice Krispie treat cake for the rehearsal dinner.
7 recipes of Rice Krispie treats later, it was complete.
| The bottom layer got a nice chocolate filling |
| Maddy is a master at stirring marshmallows |
| It was difficult to find something big enough to build it on, so we flipped it out onto wax paper and my sister and I carefully slid it onto the upside tray |
| Almost complete... |
| Dark chocolate covered almonds did the trick |
| A little decoration |
![]() |
| The hubby and I cutting the cake with the biggest knife known to man |
19 June 2010
04 February 2010
Double Chocolate Cherry Oatmeal Cookies
I had a moment of domesticity last night and decided to make a quick batch of cookies. I inherited some baking supplies from a coworker a week ago and had an idea immediately to use them in an oatmeal cookie.
Using a basic oatmeal cookie recipe from the Test Kitchen's Best Light Recipe* cookbook, I added chopped dried cherries, a large handful of white chocolate chips, and another large handful of dark chocolate chips.
Sorry so dark
They were delicious right out of the oven--just wish I would've had some milk around to go with them. Shawn gave his hearty approval, as did my coworkers the next day, even though they were cold.
*Side note: I highly recommend the Light Recipe cookbook. They focus heavily on flavor and try to cut down the fat and calories of a lot of great dishes. I'm not a huge believer in low-fat diets, but if you can trim down a recipe without using crazy altered ingredients, I'm all for it. I've cut down my use of oils in a lot of recipes just using techniques like sweating the onions.
06 November 2009
Carrot Cupcakes with Cream Cheese Frosting
I haven't fallen off the face of the planet, but I have been busy/lazy. Two weeks ago I got engaged to my boyfriend of five years and since then it's been a whirlwind of activity. Not all of it has been related to the engagement, but it's definitely added some more craziness. (It's good though.)
My latest creation has been carrot cupcakes with cream cheese frosting. I made them for a work birthday party, so I needed them to be perfect. I've talked so much about loving to bake it would be a major disappointment if they were gross. So, that meant calling in the Test Kitchen once again. I found some other great recipes on Epicurious.com for carrot cake with ginger cream frosting and candied carrot curls, but it sounded a little adventurous for this crowd. I went with the basics.
Since it was to celebrate fall birthdays and one gal's birthday is on Halloween, I used some candy corn for the decoration on top (After Halloween price = $0.50...aw yeah). I think they turned out pretty dang good.

The hardest part about this was whisking everything by hand. But I do what the Test Kitchen tells me to--at least the first time around. Emulsifying the oil into the sugars and eggs had to be the hardest part, but it was definitely worth it. All I can say, though, is thank goodness for my Cuisinart. I don't know how I used to grate all that carrot by hand!
My latest creation has been carrot cupcakes with cream cheese frosting. I made them for a work birthday party, so I needed them to be perfect. I've talked so much about loving to bake it would be a major disappointment if they were gross. So, that meant calling in the Test Kitchen once again. I found some other great recipes on Epicurious.com for carrot cake with ginger cream frosting and candied carrot curls, but it sounded a little adventurous for this crowd. I went with the basics.
Since it was to celebrate fall birthdays and one gal's birthday is on Halloween, I used some candy corn for the decoration on top (After Halloween price = $0.50...aw yeah). I think they turned out pretty dang good.

The hardest part about this was whisking everything by hand. But I do what the Test Kitchen tells me to--at least the first time around. Emulsifying the oil into the sugars and eggs had to be the hardest part, but it was definitely worth it. All I can say, though, is thank goodness for my Cuisinart. I don't know how I used to grate all that carrot by hand!
08 June 2009
While the trainer's away, the campers will play
My personal trainer was in Texas teaching other people how to torture train people, so I did not work out on Saturday like I normally would. Apparently this proved to be a bad thing; or good, depends on how you look at it.
Friday night I went to see Metric. I ate at Pause. Cuban sandwich...soooo good.
Saturday, we had a little goodbye BBQ for our dear friend Chris who was visiting, but had to go away for a few more months. Sad. But at least the food was delicious. We started at 2. I brought my macaroni salad (every time I say I'm bringing it, I feel a bit like a mom from the 50s). Chris bought pretty much every animal there is to grill. Rib eye roast. Lemon-rosemary chicken skewers. Pork burgers with tomatillos and avocado. Elk ribs (delicious but chewy; I may start an elk-only diet since you'd give up chewing well before you'd eat too much). So much meat. Oh, and asparagus and these amazing tomatoes Stacey makes topped with bleu cheese and bread crumbs, then grilled until crispy (sorry the picture is a little blurry). I tried to graze throughout the day, rather than filling up fast. I thought that might help reduce the chances of eating too much. I was wrong, because then Amanda and Aric showed up and brought artichoke dip and desserts. Oy. So, many meats and side dishes later, I was beyond full. The one thing I can say is that at least I didn't drink too much. Just a glass of white sangria (care of Michael), a phenomenal glass of pinot (care of Aric), and a couple beers. Not bad for a 10-hour stretch.


The next day, I planned on grilling a hunk of London Broil, which had been marinating in a mixture of olive oil, rosemary, garlic, and red onion overnight. It was a little overcast, but never rained, so we were good to grill.
I took advantage of the cooler weather to get some baking in while I could. I made a batch of peanut butter brownies, as well as another loaf of multigrain bread. I went for a run during the bread's second rising (still makes me think of church), and when I came back, it was a little larger than I expected. My last loaf turned out well, but was a little dense, so I was actually glad I let it rise so much longer.
The top heavy bread
And back to the grilling. To go along side our meat, I made some soft asiago polenta and we coated asparagus in olive oil and drizzled it with lemon juice after it came off the grill. Top the polenta off with a hunk of asiago and pour a glass of wine--a perfect Sunday night dinner!

Shawn enjoys a brownie with our movie
Friday night I went to see Metric. I ate at Pause. Cuban sandwich...soooo good.
Saturday, we had a little goodbye BBQ for our dear friend Chris who was visiting, but had to go away for a few more months. Sad. But at least the food was delicious. We started at 2. I brought my macaroni salad (every time I say I'm bringing it, I feel a bit like a mom from the 50s). Chris bought pretty much every animal there is to grill. Rib eye roast. Lemon-rosemary chicken skewers. Pork burgers with tomatillos and avocado. Elk ribs (delicious but chewy; I may start an elk-only diet since you'd give up chewing well before you'd eat too much). So much meat. Oh, and asparagus and these amazing tomatoes Stacey makes topped with bleu cheese and bread crumbs, then grilled until crispy (sorry the picture is a little blurry). I tried to graze throughout the day, rather than filling up fast. I thought that might help reduce the chances of eating too much. I was wrong, because then Amanda and Aric showed up and brought artichoke dip and desserts. Oy. So, many meats and side dishes later, I was beyond full. The one thing I can say is that at least I didn't drink too much. Just a glass of white sangria (care of Michael), a phenomenal glass of pinot (care of Aric), and a couple beers. Not bad for a 10-hour stretch.
The next day, I planned on grilling a hunk of London Broil, which had been marinating in a mixture of olive oil, rosemary, garlic, and red onion overnight. It was a little overcast, but never rained, so we were good to grill.
I took advantage of the cooler weather to get some baking in while I could. I made a batch of peanut butter brownies, as well as another loaf of multigrain bread. I went for a run during the bread's second rising (still makes me think of church), and when I came back, it was a little larger than I expected. My last loaf turned out well, but was a little dense, so I was actually glad I let it rise so much longer.
And back to the grilling. To go along side our meat, I made some soft asiago polenta and we coated asparagus in olive oil and drizzled it with lemon juice after it came off the grill. Top the polenta off with a hunk of asiago and pour a glass of wine--a perfect Sunday night dinner!
29 April 2009
Back to bread baking
Since this last weekend may have been the last chilly/free weekend I had for some time, I thought I would finally tackle my goal of my first multigrain bread. I bought the ingredients about 6 weeks ago and haven't gotten around to making it. Bread baking is time consuming, but I manage to find time every other weekend. I think the idea of making the hot cereal and cooling it before I even got started on the actual kneading scared me off a bit. But this Sunday, I had more time than usual since I'm healing a small running injury and would be skipping my 9 mile run. (Hallelujah).
And while I was baking one loaf, why not just throw another one in there? That was my reasoning apparently, because I also made an effort to prepare a lovely parmesan focaccia for
our pasta dinner on Monday. What was I thinking? I spent about 4 hours baking bread on Sunday, along with another hour making dinner. Good thing it was worth it.
Both loaves turned out very well. The multigrain is especially good. It's holding up well in the refrigerator, too, and makes wonderful toast.
And while I was baking one loaf, why not just throw another one in there? That was my reasoning apparently, because I also made an effort to prepare a lovely parmesan focaccia for
20 April 2009
First BBQ of the year
Saturday was the first really beautiful day in Portland of the year. It was finally not only sunny, but warm, too. There's just nothing better than a summery Portland day.
Shawn and I did some record shopping first thing in the morning in honor of Record Store Day and in a great attempt to grab as many limited-edition records as possible. After shopping, a stop at the grocery store, and yard work, we deserved a relaxing evening of BBQ and doing nothing.
The first BBQ of the year. BBQ chicken breasts, potatoes, and homemade biscuits. Since all the good grilling vegetables are still pretty much out of season still, we made frozen green beans on the side.
Happy Spring!
Shawn and I did some record shopping first thing in the morning in honor of Record Store Day and in a great attempt to grab as many limited-edition records as possible. After shopping, a stop at the grocery store, and yard work, we deserved a relaxing evening of BBQ and doing nothing.
Happy Spring!
06 April 2009
Who needs Pillsbury?
Who needs to buy canned biscuits when it takes all of 15 minutes to whip a batch of homemade? The best part is that the ingredients are simple and most people usually have them on hand. I made these delicious biscuits (Test Kitchen, of course) to go with our dinner of oven-fried chicken, mashed potatoes, and mixed vegetables.


Ah, comfort food. It was my first night back after house sitting for two weeks. It's good to be home.
Subscribe to:
Posts (Atom)